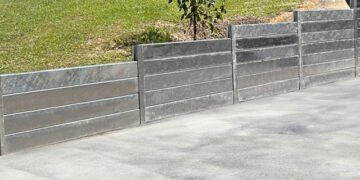
For homeowners looking to tackle a small retaining wall project on their own.
Retaining walls are an excellent solution for holding back soil in areas with sloping terrain, preventing soil erosion, and creating a flat space for landscaping or other purposes. If you’ve been considering installing a retaining wall on your property, this guide will provide a step-by-step process for a small project that you can handle yourself.
How to Build DIY Retaining Walls?
1. Determine the Purpose and Need
Before diving into the construction phase, identify the main reasons for needing a retaining wall. This will help determine the wall’s size, shape, and the materials needed. Common reasons include:
- Preventing soil erosion.
- Creating a flat space for a garden or patio.
- Aesthetic appeal.
2. Choose Your Materials
The most popular materials for retaining walls include:
- Concrete Blocks: They’re durable, versatile, and relatively easy to work with. Concrete sleepers are also a good choice for stability.
- Natural Stone: Offers a timeless and aesthetic appeal.
- Timber: A more rustic look but not as durable as other materials.
- Bricks: They create a classic look but require more expertise to install.
Your choice will be influenced by the wall’s purpose, desired appearance, budget, and the environment it will be exposed to.
3. Plan and Design
Measure and sketch out your design on paper. Factor in:
- Height: A small DIY wall should be no taller than 3-4 feet. For taller walls, consult a professional due to safety concerns.
- Length and Width: Consider how long and how wide the base should be.
- Drainage: Plan for a drainage system to prevent water buildup behind the wall, which can cause damage over time.
4. Prepare the Ground
a. Mark the Area: Using stakes and string, outline the wall’s shape.
b. Dig a Trench: The trench should be as wide as your wall material plus 6 inches for the base material. Its depth should be about 1/8 of the wall’s height or at least 6 inches.
c. Compact the Soil: This provides a solid foundation. You can rent or buy a hand tamper for this purpose.
d. Add Base Material: Fill the trench with gravel or crushed stone up to about 3-4 inches. Compact this layer.
5. Lay the First Course
Begin at the wall’s lowest point. Place the first block, brick, stone, or timber piece, ensuring it’s level both side-to-side and front-to-back. Use a rubber mallet to adjust as needed. Lay the rest of the first course, ensuring each piece is aligned and level.
6. Install a Drainage System
Lay a perforated drainage pipe behind the first course, ensuring it has a slight slope away from the wall. This helps divert water from the wall. Cover the pipe with gravel, leaving space for the subsequent courses.
7. Continue Building the Wall
a. Stack the Next Courses: Depending on the material used, you might need to apply a construction adhesive between layers for added stability.
b. Ensure Proper Setback: With each course, slightly angle the material back towards the slope. This provides extra stability.
c. Stagger the Joints: Avoid lining up the joints between blocks or stones vertically. This interlocking pattern gives the wall more strength.
8. Implement Wall Reinforcement (If Needed)
For walls over 2 feet tall, consider adding reinforcement. This can be done using geogrid, a mesh-like material that stabilizes the soil behind the wall. Place the geogrid between courses of your material, extending it back into the retained soil.
9. Finish with the Top Course
The final course is crucial, as it will be the most visible. Depending on the material, you might want to choose a special capstone or finish. If you’re using concrete blocks or bricks, secure the top layer with construction adhesive.
10. Backfill and Compact
Fill the space behind the wall with gravel up to about 12 inches from the top. This facilitates drainage. The remaining space can be filled with native soil. Compact each layer as you fill.
11. Landscape and Beautify
Once your wall is complete, landscape the area above and below the wall. You can plant flowers, shrubs, or even install a patio or pathway.
Conclusion
Building a DIY retaining wall is a rewarding project that not only adds functionality to your yard but also enhances its aesthetic appeal. By following these steps and ensuring each layer is correctly placed and compacted, you’ll have a sturdy and durable wall that serves its purpose and stands the test of time.
Remember, for larger projects or if you’re uncertain about any step, consult with professionals. They can provide invaluable advice and prevent costly mistakes.
Recommended Posts:


