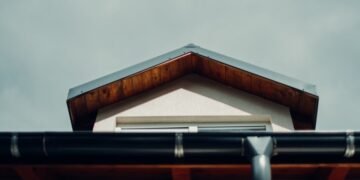
Flat roof shingles are a popular roofing option for commercial and residential buildings with low-sloping or flat roofs. They provide durability, weather resistance, and aesthetic appeal to the overall structure. If you’re considering roof replacement and installing flat roof shingles yourself, it’s essential to follow proper installation techniques to ensure a successful and long-lasting roof. In this article, we’ll guide you through the step-by-step process of installing flat roof shingles.
Before you Begin
Before you begin the installation process, there are a few important considerations to keep in mind:
Safety First: Roof work can be dangerous, so it’s crucial to prioritize safety. Ensure you have the necessary safety equipment, such as a harness, non-slip shoes, and a stable ladder. It’s also recommended to have a partner to assist you during the installation process.
Materials and Tools: Gather all the necessary materials and tools before starting the flat roof installation. You will need flat roof shingles, underlayment, roofing nails, adhesive, a utility knife, a chalk line, a measuring tape, a ladder, and a roofing hammer.
Weather Conditions: Choose a time to install the shingles when the weather is dry and calm. Rain, snow, or high winds can disrupt the installation process and compromise the quality of the roof.
Required Tools and Materials
Installing flat roof shingles requires certain tools and materials that are necessary to complete the job properly. Here’s a list of the materials and tools that are essential for installing flat roof shingles:
- Drip Edge
- Hook Blades
- Roofing Nails
- Stapler
- Tin Snips
- Work Gloves
- Caulking Gun
- Air Compressor
- Air Hose
- Roof Harness and Scaffolding
- Straight Edge
- Utility Knife
Applying a Waterproof Membrane Underlayment
Before installing flat roof shingles, it is crucial to apply a waterproof membrane underlayment. This is to prevent water infiltration and increase the longevity of your roof. The following steps will guide you through the process of applying a waterproof membrane underlayment:
1. Clean and Dry the Roof Deck:
Start by cleaning and drying the roof deck. Remove any debris or loose material from the surface of the roof through sweeping or blowing. Then, wash the roof with a solution of water and detergent to remove any dirt or grime. Rinse it thoroughly with clean water and let it dry completely.
2. Choose the Appropriate Waterproof Membrane Underlayment Material:
Select the suitable waterproof membrane underlayment material for your specific roofing system. This can be EPDM, TPO, or PVC. The choice of material will depend on your budget, the pitch of your roof, and the specific requirement of your roof.
3. Apply the Membrane Underlayment:
The application method will depend on the type of membrane underlayment chosen. Mechanically anchoring it with fasteners, ballasting it with stone, or gluing it are some of the methods available. Follow the manufacturer’s instructions to ensure the correct method of installation.
4. Use a Reflective Coating:
If you choose a dark waterproof membrane underlayment such as EPDM, it is essential to apply a reflective coating. The reflective coating will prevent the membrane from absorbing heat, which can lead to accelerated wear and tear. This coating will help prolong the life of the membrane and ultimately, your roof.
5. Benefits of Using a Waterproof Membrane Underlayment:
Using a quality waterproof membrane underlayment provides added protection for your roof and home. It will prevent water from seeping through your roof, protecting the underlying structure from rot and damage. Additionally, this underlayment will increase the energy efficiency of your home by reducing heat transfer through the roof, resulting in lower energy bills over time.
Installing the Shingles
Installing flat roof shingles can be a tricky task, but with proper preparation and careful execution, it can give your roof a durable and attractive finish. From choosing the right materials to the actual installation of the shingles, every step is crucial to ensure that your flat roof is protected against leaks and damage. In this article, we will provide you with a comprehensive guide on how to install flat roof shingles, including tips and tricks to make the process smoother and easier.
Setting Up a Starter Course of Shingles
When installing flat roof shingles, it is essential to begin by setting up a starter course. This is an important step for ensuring the proper installation of all the shingles on the roof. Here’s how to set up a starter course of shingles before installing the rest of the shingles:
1. Begin the starter row shingles by running them 1/2 in. past the drip edge with the adhesive strip facing up. This will help to ensure the shingles are secured in place and do not lift or blow off during inclement weather.
2. Overlap the starter shingles 3/4 in. past the drip edge, and nail them down with five nails about 2 to 3 in. up from the bottom of the eave. This will help to ensure that the shingles are securely attached to the roof deck and will not move or shift.
3. Ensure that the gable-end starter shingles are hung by overlapping them by 2 to 3 in. with the eave starter shingles and extending 1/2 in. past the drip edge. This helps to ensure that the shingles at the edge of the roof are properly aligned and will not be subject to wind damage.
4. The starter row shingles should be narrower than full shingles to prevent a visible hump in the roof. This will help to ensure that the roof looks smooth and uniform, and that there are no visible seams or other imperfections that could detract from its overall appearance.
By following these simple steps, you can easily set up a starter course of shingles that will help ensure the proper installation of all the shingles on your flat roof. Remember to use the right materials and to follow all building codes and regulations to ensure the safety and durability of your roof for years to come.
Summary
Installing flat roof shingles requires careful preparation, precise measurements, and attention to detail. By following the step-by-step guide outlined in this article and adhering to proper maintenance practices, you can achieve a durable, weather-resistant, and aesthetically pleasing flat roof. Remember to prioritize safety throughout the installation process and consult with professionals when needed. With the right approach, your flat roof shingles can provide years of protection and enhance the overall value of your property.
Recommended Posts:


